Welcome to the seventh installment of our introductory Rivenstone gameplay series. These blogs are meant to cover some of the basic rules of the game, giving you a taste of what the tabletop experience will be when the game launches later this year.
If you’re just joining us, you can find previous blogs exploring the gameplay as well as the fiction of Rivenstone on our website.
Be the first to know when we release our future posts in our gameplay blog series by signing up for our newsletter on our site and by following our social media accounts on Twitter, Facebook, and Instagram.
Today’s post is going to be discussing the namesake of the game, Rivenstone itself!

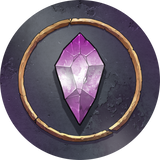
Rivenstone Shards
The material that gives the game its name is a very powerful resource and one of the main things you will battle opponents for control over. The shards of rivenstone that empower your models during a battle are harvested from rivenstone deposits and represented by tokens as we discussed in last week’s blog.
Rivenstone Deposits
Shards are gathered from rivenstone deposits, which are represented on the table by awesome looking 50mm miniatures. Each scenario you play includes a map that tells you where the deposits are located on the battlefield for that scenario.

Rivenstone Eruptions and Harvesting Shards
At the end of each player’s turn in the Clash phase that player chooses a rivenstone deposit to erupt and follows these rules for harvesting shards.
Quick Note: We’ll talk more about the Clash phase in a future blog, but this is the main phase of each round where players alternate taking turns to activate their models.
The player whose turn is ending chooses a rivenstone deposit that does not have an exhaustion token on it, then places an exhaustion token on it to indicate it is erupting.
Next, that player rolls the shard die.

Starting with the player who placed the exhaustion token, each player chooses a model to harvest a shard. For each shard icon rolled, each player can choose one model within range of the erupting deposit to harvest. The range of the eruption is indicated by the result of the shard die roll, and the chosen model must have an Ingenuity stat of 1 or greater.
The same model can be chosen to harvest multiple shards from the same eruption as long as that model has not been destroyed.
Models chosen to harvest shards of rivenstone roll a number of skill dice equal to their Ingenuity stat. The fist symbol and the wild symbol are successes in this roll. If a model focuses its roll by burning a vigor, it also counts the focus symbol as successes.
- If the roll includes at least one success, the model has safely collected a shard.
- If no successes are rolled, the model faced some difficulty harvesting. It still collects the shard but suffers 1 damage.
After these rolls are resolved, players add a shard to their reservoir for each shard harvested by one of their models, even if the model was destroyed by the shard. This means that when you choose to have a model harvest a shard you know you’re gaining one, no matter what.
Of course, the danger of harvesting a magically irradiated rock that is erupting is … you might die!
Finally, after all eligible players have resolved their harvest rolls, if all deposits have exhaustion tokens, remove those tokens. This means that every deposit must erupt once before they “clear off” and are eligible to erupt again in later turns.
Example: Hanna (the red player) has just finished a turn, chosen a deposit to erupt, and rolled the shard die. The result is Short range and two shard icons. This means that players with models within Short range of the deposit have a chance to harvest up to two shards each.
Hanna has only one model within range, model B, and chooses to harvest the first shard with it. She makes a roll using the model’s Ingenuity of 1 and rolls a fist, which is a success. Model B has safely harvested a shard, so Hanna adds a shard to her reservoir.
She then chooses to harvest the second shard with the same model and once again rolls using model B’s Ingenuity. She is not as lucky this time and does not roll a success. Model B suffers 1 damage, but Hanna still adds a shard to her reservoir.
After Hanna is finished rolling, Nate (the blue player) gets a chance to harvest. He has two models within range and decides to roll for model D first. Nate’s roll does not contain any successes, so the model suffers 1 damage and is destroyed.
Nate decides that he does not want to risk his other model being destroyed, so he chooses not to harvest the other shard and adds only one shard to his reservoir, from his first attempt.

Harvesting Shards with Interact Actions
In addition to harvesting shards from an erupting deposit at the end of each player’s turn, a model within Tight range of a deposit can use an Interact action to harvest a shard. The player makes an Ingenuity roll as described above to avoid being damaged and then adds one shard to their reservoir.
No shard die is rolled when harvesting rivenstone in this manner. This method of harvesting represents mining the deposit instead of collecting shards as they erupt.
This action can be performed on a deposit regardless of whether it has an exhaustion token on it.
Consuming Shards
Rivenstone is the most powerful substance known, and even the smallest shards hold amazing amounts of energy. Models can consume these shards for a variety of benefits during a game.
When one of your models consumes one or more shards, you remove those shards from your reservoir.
A model can consume a shard before or after performing an action during its activation. Some abilities have specific timing for when this happens, such as abilities that trigger in response to enemy actions. Each special rule indicates when and how it can be used, and how many shards the model must consume to use the ability.
Additionally, there are a few common abilities that consume shards that aren’t listed on stat cards. These abilities, listed below, apply only to the type of models indicated in brackets in the ability’s name.
- Burst of Strength [Any Model] This model can consume one shard during its activation to immediately perform a free Melee Attack action.
- Rapid Reload [Any Model] This model can consume one shard during its activation to immediately perform a free Missile Attack action.
- Arcane Surge [Any Model] This model can consume two shards during its activation to immediately perform a free Magic Attack action.
- Infuse [Hero Models] This model can consume a number of shards equal to its Infuse stat during its activation. If it does, flip its card to the infused side and remove all damage and conditions from the model.
Buying Additional Attacks with Shards
Consuming shards to make additional attacks at the right time is critical to achieving victory. A model can consume a shard to make these attacks separate from their normal two actions per activation, which allows players to really surprise their opponents with how their models activate.
For example, a model could consume shards to make Attack actions after spending its two normal actions to Walk and then Run, allowing them to threaten enemy models much farther away than they normally could. Or a model already in combat could consume shards to attack and destroy the nearby enemies, then use its normal action to walk away.
A model can even consume shards between their two normal actions, allowing for very unpredictable attacks.
You’ll notice that the cost to perform free magic attacks consumes two shards instead of one. This is because magic attacks often are very powerful and have more potent effects than melee or missile attacks.
Corum’s Wind of Remorse magic attack is a very good example of what we mean. "When this attack destroys an enemy model, before the enemy model returns to its player's reserves, this model can burn a vigor. When it does, you can spawn one Risen undead follower within Close range of the destroyed model."

The Dangers of Shard Consumption
Releasing the power of a shard is a dangerous endeavor, though some models have more strength to resist being harmed by it than others. A model can consume any number of shards, but each type of model has a Threshold stat which determines how many shards it can consume in a turn before suffering damage.
The Threshold of each model type is:
- Follower: 1
- Veteran: 2
- Champion: 3
- Legend: 4
When a model consumes one or more shards to use an action, ability, or effect, and the number of shards it has consumed for the turn exceeds its Threshold, the model suffers damage. This damage is equal to the total number of shards it has consumed over its Threshold value for the entire turn.
Think of this like scaling damage. You don’t simply suffer 1 damage each time you go above Threshold. The more you push your luck with shards in a turn, the more damage you will suffer for it each time.
Damage from exceeding a model’s Threshold is suffered after the action, ability, or effect that consumed the shard is fully resolved.
Example 1: Hanna has her Shard Knight consume a shard to use its Burst of Strength ability, making a free melee attack. Shard Knights are Champions and have a Threshold of 3, so they can consume up to three shards without suffering damage.
Hanna then chooses to infuse the Shard Knight, which costs that model three shards to do and brings the total number of shards the Knight has consumed that turn to four. The Shard Knight suffers 1 damage after infusing, as it has exceeded its Threshold by 1 for the turn.
After infusing, Hanna has the Shard Knight consume another shard to use the Burst of Strength ability again. After resolving this ability, the Shard Knight suffers 2 damage, as the total number of shards it has consumed past its Threshold for the turn is now 2. If the Shard Knight repeatedly consumed shards to use Burst of Strength that turn it would suffer 3 damage, then 4 damage, then 5 damage, and so on.
Once the turn ends, the Shard Knight’s count of consumed shards resets to zero. It will suffer damage this way again only if it pushes past its Threshold of 3 in a single turn later in the game.
Example 2: Jimmy has activated his Iron Guard Weldmonger and has just had it consume a third shard this turn to use Burst of Strength. The Weldmonger is a Veteran hero with a Threshold of 2, so it suffers 1 damage for consuming the third shard.
Later in the same activation, Jimmy has the Weldmonger consume two shards to infuse. When a hero infuses, it removes all damage, so the Weldmonger loses the 1 damage it suffered earlier by exceeding its Threshold. Once the infuse is resolved, however, the Weldmonger suffers damage for the number of shards past its Threshold it has spent this turn. That’s 3 damage!
Thank you for joining us for this installment of the gameplay blog series. Join us again next time as we dive further into more rules!