Welcome to the sixth installment of our introductory Rivenstone gameplay series. These blogs are meant to cover some of the basic rules of the game, giving you a taste of what the tabletop experience will be when the game launches later this year.
If you’re just joining us, you can find previous blogs exploring the gameplay as well as the fiction of Rivenstone on our website.
Be the first to know when we release our future posts in our gameplay blog series by signing up for our newsletter on our site and by following our social media accounts on Twitter, Facebook, and Instagram.
Today’s post is going to be discussing the various tokens you will use while playing Rivenstone.

Resource Tokens
There are two primary resources to keep track of when playing Rivenstone: shards and vigor.
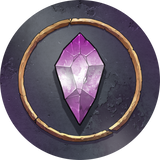
Shard Tokens: Players do not begin the game with any of these tokens, and instead must use their models to either mine rivenstone deposits on the map or harvest erupting deposits. Many models have unique abilities that require the consumption of shard tokens to use.
All heroes can consume shard tokens to infuse to their stronger form. Additionally, there are a few common abilities that any model can consume shards to use, such as making additional attacks during their activation.

Vigor Tokens: Each player has their own pool of seven vigor tokens. These tokens are double-sided to indicate whether they are charged or burnt. Like shards, many models have abilities that require that they burn a vigor to use that ability.
Also, like shards there are some core abilities that any model can burn a vigor to use, such as focusing a die roll to make the focus symbol count as a success for that roll.
Unlike shards, vigor automatically refreshes at the end of each round. A player knows that they will always go into each round with exactly seven vigor to burn, and must choose wisely when and how to burn each token.
Damage and Exhaustion Tokens
The tokens discussed above are unique in that they do not belong to a single model in a player’s warband. They are a resource for the player’s entire force, that any model can use.
The next two tokens we’re going to discuss, however, are very specific to the model that has the token placed on it.

Damage Tokens: For each point of damage a model suffers, they gain a damage token. When a model has suffered as much damage as their Health, they are destroyed and returned to their owner’s reserves to be spawned into play later in the game.

Exhaustion Tokens: When a model activates, at the end of its activation it gains a single exhaustion token. Every model has a Stamina stat, as we discussed in a previous blog covering stat cards. When it’s a player’s turn to choose which models they want to activate, they cannot choose a model that has a number of exhaustion tokens on it equal to, or greater than, its Stamina stat.
For example, a follower with a Stamina of 1 can only activate once before exhaustion tokens are cleared, while a follower with a Stamina of 2 could be activated twice (on two different turns) before exhaustion tokens are cleared.
We’ll cover how exhaustion clearing works in a later blog, when we discuss the round structure of the game.
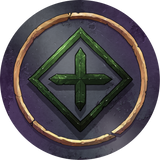
Objective Tokens
Each scenario features two elements: rivenstone deposits and objectives. Deposits are represented by 50mm-based miniatures that are also terrain features, while objectives are represented with tokens.

Objective Tokens: The decision to make objectives abstract tokens is for narrative reasons. What these tokens represent in each scenario can be wildly different. The token could be a piece of machinery that models must interact with, it could be a ruined casket filled with arcane relics, a zone of wild magic, or it could simply be a strategically important area of the battlefield that must be secured and held. Each scenario specifies what these tokens are in that given game.
No matter what the objective represents narratively, on the tabletop it is physically represented by a 50mm token. Each scenario provides the rules of how to interact with that token.
One rule that is true for nearly every scenario objective is that the token isn’t treated like a model or piece of terrain. Models can walk over these tokens without issue, but typically cannot stand on top of them.
Condition Tokens
The largest pool of tokens in the game are condition tokens, yet they are also the tokens you are the least likely to see each game.
In any game of Rivenstone you are guaranteed to use shard, vigor, damage, exhaustion, and objective tokens. However, condition tokens are effects that are only put into play when a model has an ability that indicates that they do so. This is often done via the special rules of weapons. For example, the flamethrowers of the Iron Guard Tunnel Sweepers cause the Burning condition to enemy models they hit.
A model can suffer any number of conditions but cannot suffer multiple iterations of the same condition at once. Once a model is Burning, it cannot get a second Burning token unless it gets rid of the first one.
A common action that any model can take during its activation is the Cleanse action, with removes one1 condition from a model. This means that any warrior can rid themselves of a pesky condition if they need to, but they do so at the cost of one of their two actions for the turn.
In a tempo-based wargame like Rivenstone, where every action a model can take is very important, sometimes you can’t afford to give up an action to Cleanse a condition and must instead suffer its effects.
Once a condition token is removed, the model no longer suffers its effects at all. So, for example, the Knocked Down condition prevents a model from moving or attacking. If a model uses its first action to Cleanse the Knocked Down condition, it could use its second action to them move or attack before its activation ended.
Each model suffers the following effects based on which condition it is afflicted by:

Bleed Tokens: This model suffers 1 damage at the end of its activation.
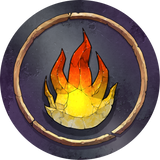
Burning Tokens: This model’s weapons suffer -1 Strength.

Confusion Tokens: This model does not count as battle-ready when determining which player controls an objective.

Encumbered Tokens: This model cannot perform Run actions.

Knocked Down Tokens: This model cannot perform Attack actions or move by marching. Models attacking this model can focus their attacks without burning a vigor.

Poisoned Tokens: This model burns a vigor at the beginning of its activation. If it cannot, it immediately suffers 1 damage.

Raging Tokens: This model treats Push results on the attacker die as Cleave results. It must always resolve a Cleave if able. If there are no enemy targets within the weapon’s range, the attack must be made against a friendly model.

Staggered Tokens: This model suffers –1 Defense.

Stunned Tokens: This model cannot consume shards.

Tagged Tokens: When a model attacks an enemy suffering this condition, they can reroll any number of skill dice in the attack roll. If they do, this condition expires after rerolling.
Thank you for joining us for this installment of the gameplay blog series. Join us again next time as we dive further into more rules!